

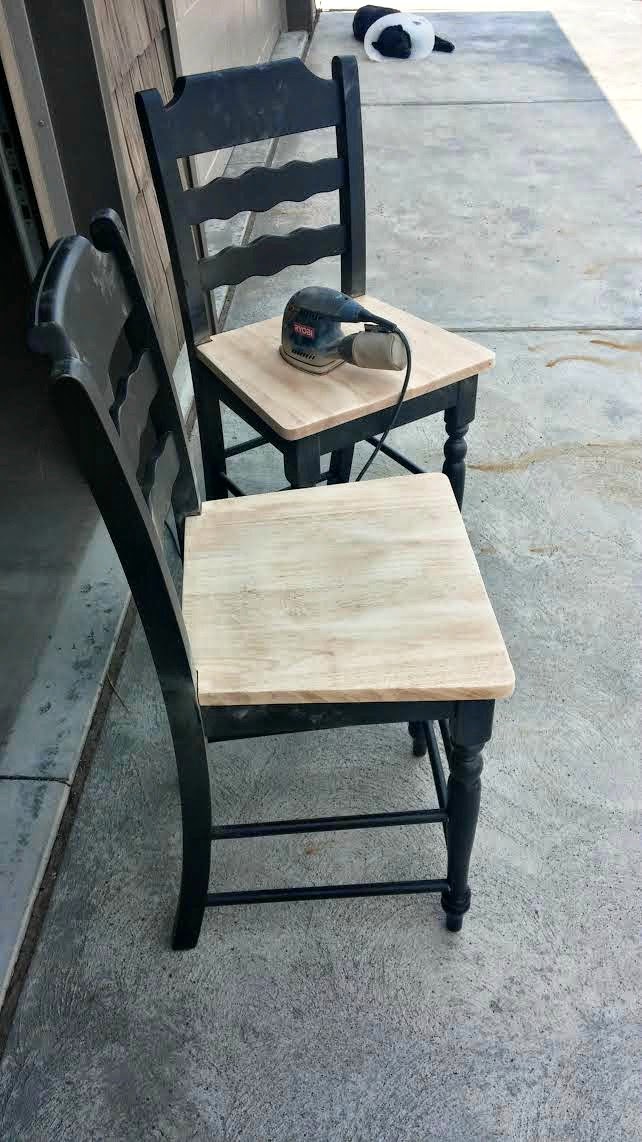
We got it on Craigslist for a steal, but it was not the style I wanted, so I decided to give it a makeover. I started with the chairs. I used my handy dandy handheld sander and took the finish off the seats:

Here's a sanded one next to a still stained one:

I timed the process, and it was about 10 minutes on the nose to completely sand a chair seat. Not too bad of a time commitment, for such a drastic change.

Next, I used spray primer to cover the black parts of the chair. I loved using Rustoleum's Painter's Touch 2X's Ultra Cover primer in flat white. I didn't worry about completely covering any traces of black. I just did a light coat so that the paint would have something to stick to.

I let that dry for an hour or so, and then I went at it with my spray paint color. I used Krylon's Catalina Mist. And I'll tell you two things. 1) I LOVE the color. 2) It is not great quality spray paint. It runs easily and doesn't provide great coverage. Rustoleum knocks it out of the park with coverage and non-runniness. Krylon, not so much. So, it took a lot of really light coats to get it all covered, and I ended up averaging an entire can of spray paint per chair. So, although I do love the color, I'd say if you can find a color you love in a Rustoleum can, I'd definitely vote you go for that one instead. The Catalina mist was also ridiculously hard to find (and then find again when I ran out part way through the project). So, for what it's worth. Great color. Not great quality. I was warned by lots of reviewers on Amazon and other sites, but I wanted the color badly enough that I was willing to put up with the poor quality. I won't be doing that again, though. Not worth it in my book.
When everything was all dry, I removed the paper and tape off the seats and gave it 3 coats of polyacrylic, which I found here and love.
So, that's the chairs. The table was a very similar story. I detached the legs, carried everything out to my workshop (a.k.a. the garage where I should really be parking my car), and went to town. I sanded the top down, then I covered the entire top with paper and tape and spray primed the base and legs with the Rustoleum primer, followed by several coats of Rustoleum spray paint in white.

Again, I cannot state emphatically enough how awesome Rustoleum covers and goes on compared to Krylon. And, no, Rustoleum has no clue who I am and I'm not getting paid to say that. It's just true. After the paint dried, I removed the paper and did 4 or 5 coats of polyacrylic over the natural wood top.
After everything dried, I brought it all back in, reassembled it, and let it cure for a week while we went on a planned vacation. We came back to a fully functional and much brighter dining set.

Any questions? Put them in the comments and I'll do my best to answer them!
Thanks for the tutorial. I can't believe this was just spray paint. I am the spray paint queen, but I have never tackled big furniture with it before. Putting it on my to-do list, though! :) Thanks!
ReplyDelete